Creating and Publishing a Form
The Forms Manager allows you to create custom forms for clubs, societies, or general users, from grant applications to general feedback forms.
⚠️ Note:
Affiliation and Reaffiliation forms are created in the Affiliation module, not in Forms Manager. Learn more →
Event Approval forms and questions are managed through the Event Approval module, not in Forms Manager. Learn more →
1. Start a New Form
Log in to the Admin Portal.
Go to Forms > Manage Forms.
Click Create Form in the top-right corner.
Choose your form type:
Standard Form - for general questions and submissions (most common form type)
Grant Application Form - for funding applications (used by most unions for funding rounds)
Grant Claim Form - for funding requests linked to a Grant Application.
Not sure which form to use? Contact us at support@hellorubric.com.
Define your audience:
Clubs & Societies only - forms meant to be filled out by club executives (logged in with club portal credentials).
Students - forms meant to be filled out by individual students.
2. Build Your Form
After choosing your form type, use the drag-and-drop form builder to create and configure your form. The elements menu is on the left, and the form body (where your form takes shape) is in the middle.
Adding and Editing Form Elements
Drag and drop an element from the left menu into the form body.
Enter your question or label (e.g., “What is your name?”).
(Optional) Add a description below the question for extra context or instructions.
Use the icons at the bottom of the element to edit, duplicate, move, or delete it.
Form Elements
In the form builder, elements are grouped by type. Drag and drop any of these elements from the left menu into the form body to build your form.
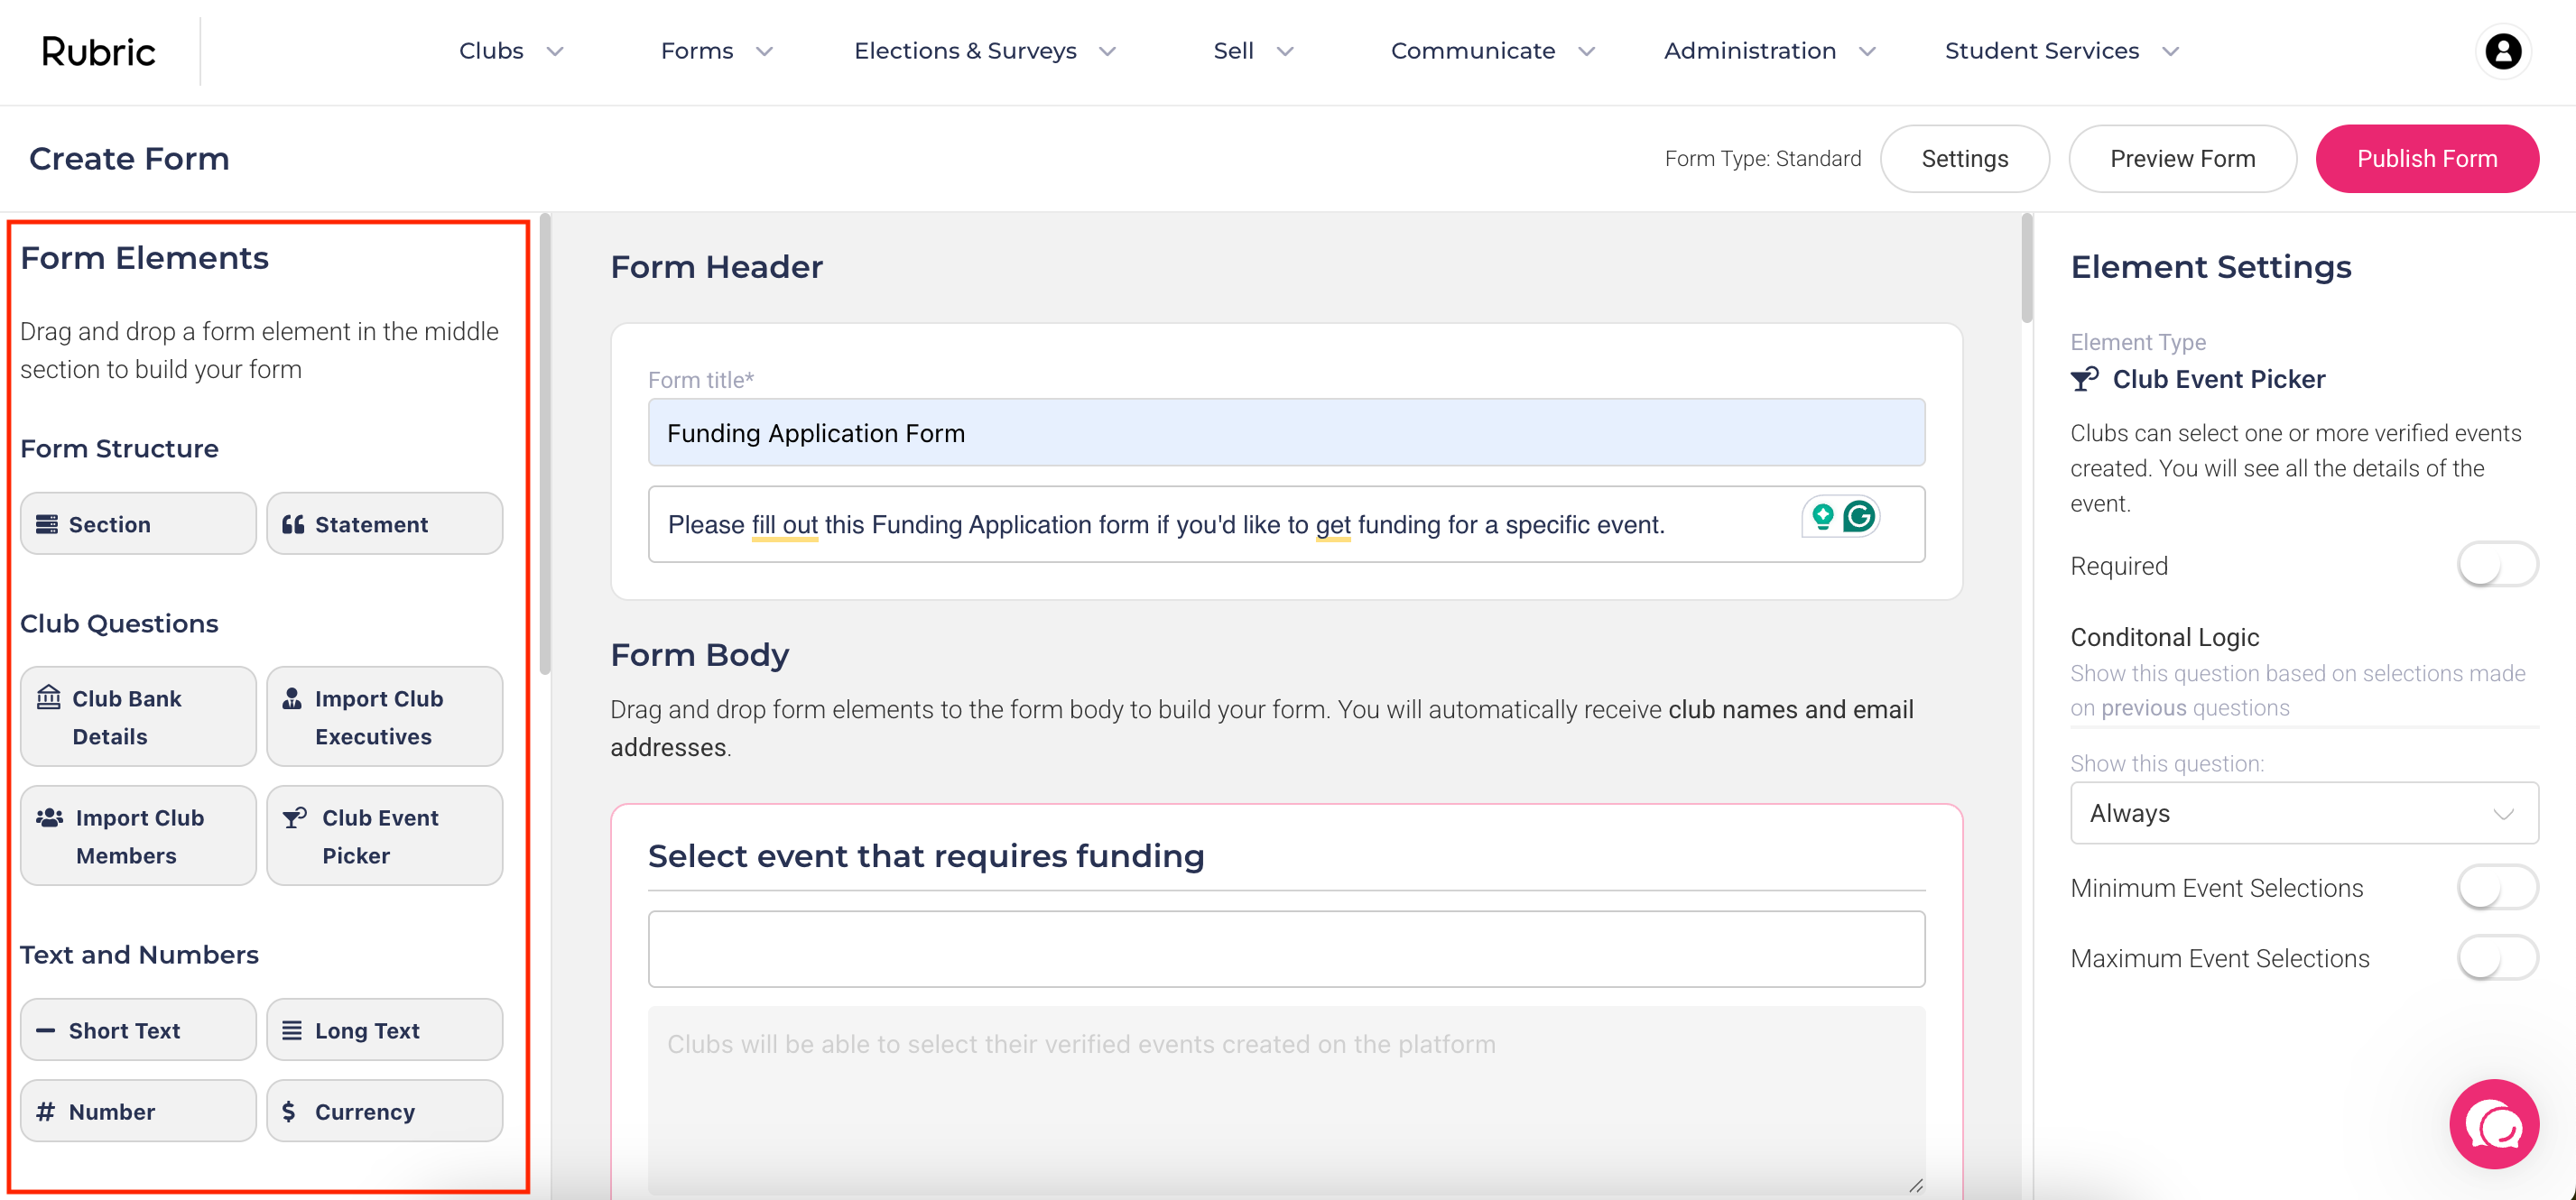
Form Structure Elements
Section: Each section creates a new page in the form. Ideal for breaking long forms into steps.
Statement: Adds static text for instructions, disclaimers, or context (no response required).
Club-Specific Elements
These fields automatically pull data from the club’s account:Clubs Bank Details: Automatically displays the club’s saved bank details.
Import Club Executives: Pulls executive details from the club’s portal. If no executive details exist and the field is required, clubs must add them before submission. You can set min/max number of execs required.
Import Club Members: Lets clubs select their membership list (or prompts them to set one up).
Club Event Picker: Allows clubs to pick one or more of their events. You can set min/max number of events required.
Text & Number Elements
Short Text: For short answers (e.g., "First Name"). Settings: Min/max character count, regex validation (for specific formats, e.g., postal codes).
Long Text: For longer answers (e.g., open-ended responses).
Number: Accepts numeric input only (with min/max limits).
Currency: For monetary amounts, with currency symbols (e.g., $ or €).
Contact Info Elements
Name, Email, Phone Number, Address: Pre-built fields with standard validation (e.g., email format checking).
Choice Elements
Radio Buttons: Single-choice options. Conditional logic is supported.
Dropdown: Single-choice, but in a dropdown format. Conditional logic is supported.
Multi-Choice: Allows multiple selections. You can set min/max number of choices allowed. Conditional logic is supported.
Likert Scale: For rating scales (e.g., “Strongly Disagree” to “Strongly Agree”). You can rename scale labels and add or remove scale categories (e.g., 3 to 10 options).
Ranking: Allows respondents rank a list of options in order.
Other Elements
HTML: Add custom HTML or embed videos/images.
Collect Payment: Use this to accept bookings or payments (supports refunds and partial refunds).
Signature: Collect digital signatures (e.g., to confirm agreement with policies).
Table: Add multiple columns with custom headers. Set min/max rows. Can include upload columns for files.
Date & Time: Users select a date/time. You can define min/max date ranges.
Multi Upload: Table-style file uploads with min/max rows.
Single Upload: For uploading one document (e.g., a constitution).
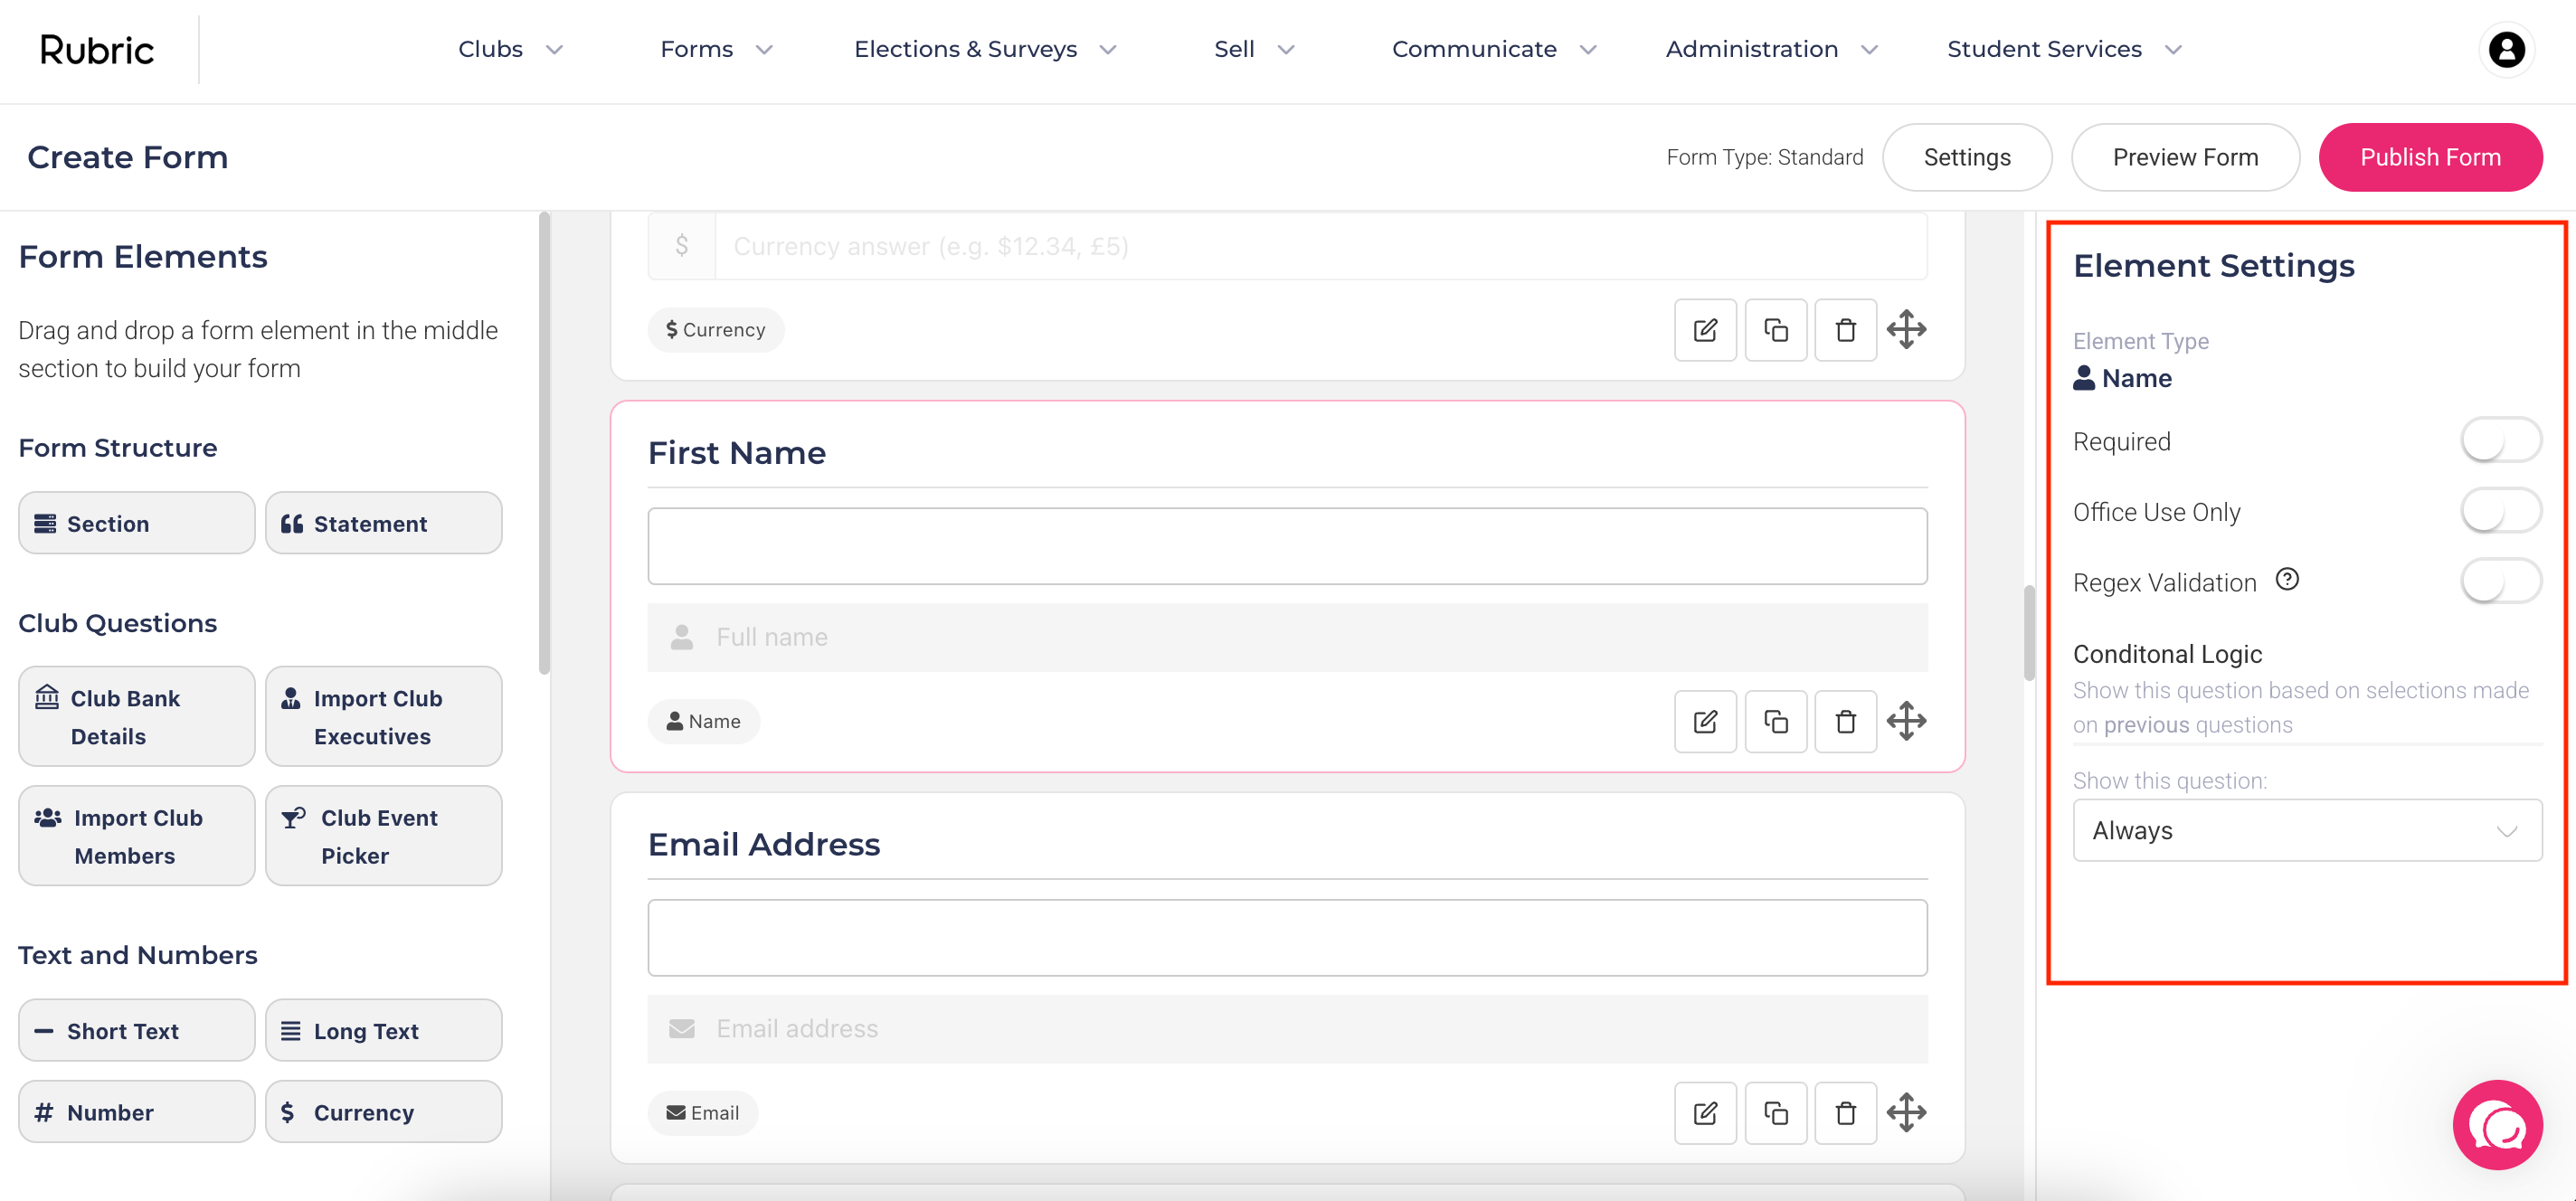
Element Settings
Most elements have configurable settings, including:
Required: Mark the question as mandatory.
Conditional Logic: Dynamically show or hide questions based on previous answers. You can only set conditional logic on Radio Buttons, Dropdown, and Multi-Choice questions.
Example:
If the respondent answers “Yes” to “Are you applying for funding?”, you can display a Funding Details section that remains hidden if they select “No.”
If the respondent chooses “Event Grant” from a “What funding type are you applying for?” dropdown, you can show event-specific questions (e.g., event dates, expected attendance).
If they choose multiple club types in a Multi-Choice question, you can show extra fields relevant to their selection.
Tip: You can chain logic for multiple questions to create personalized, step-by-step forms.
Office Use Only: The element is hidden from respondents but visible to admins, allowing internal notes or data entry after submission.
3. Configure your Form Settings
Click the Settings button in the top-right corner of the form builder to adjust how your form works and who can access it. This is where you control approvals, submission limits, notifications, and more. Key settings include:
Multi-User Approval: Learn More about Multi-Approval here.
Approvers: Enable this if multiple admins or staff members need to approve a submission. Add specific approvers in the “Approvers” field. Ideal when a form spans multiple departments (e.g., finance and club teams).
Student Exec Approvals: Set how many club executives must approve a submission before it’s submitted.
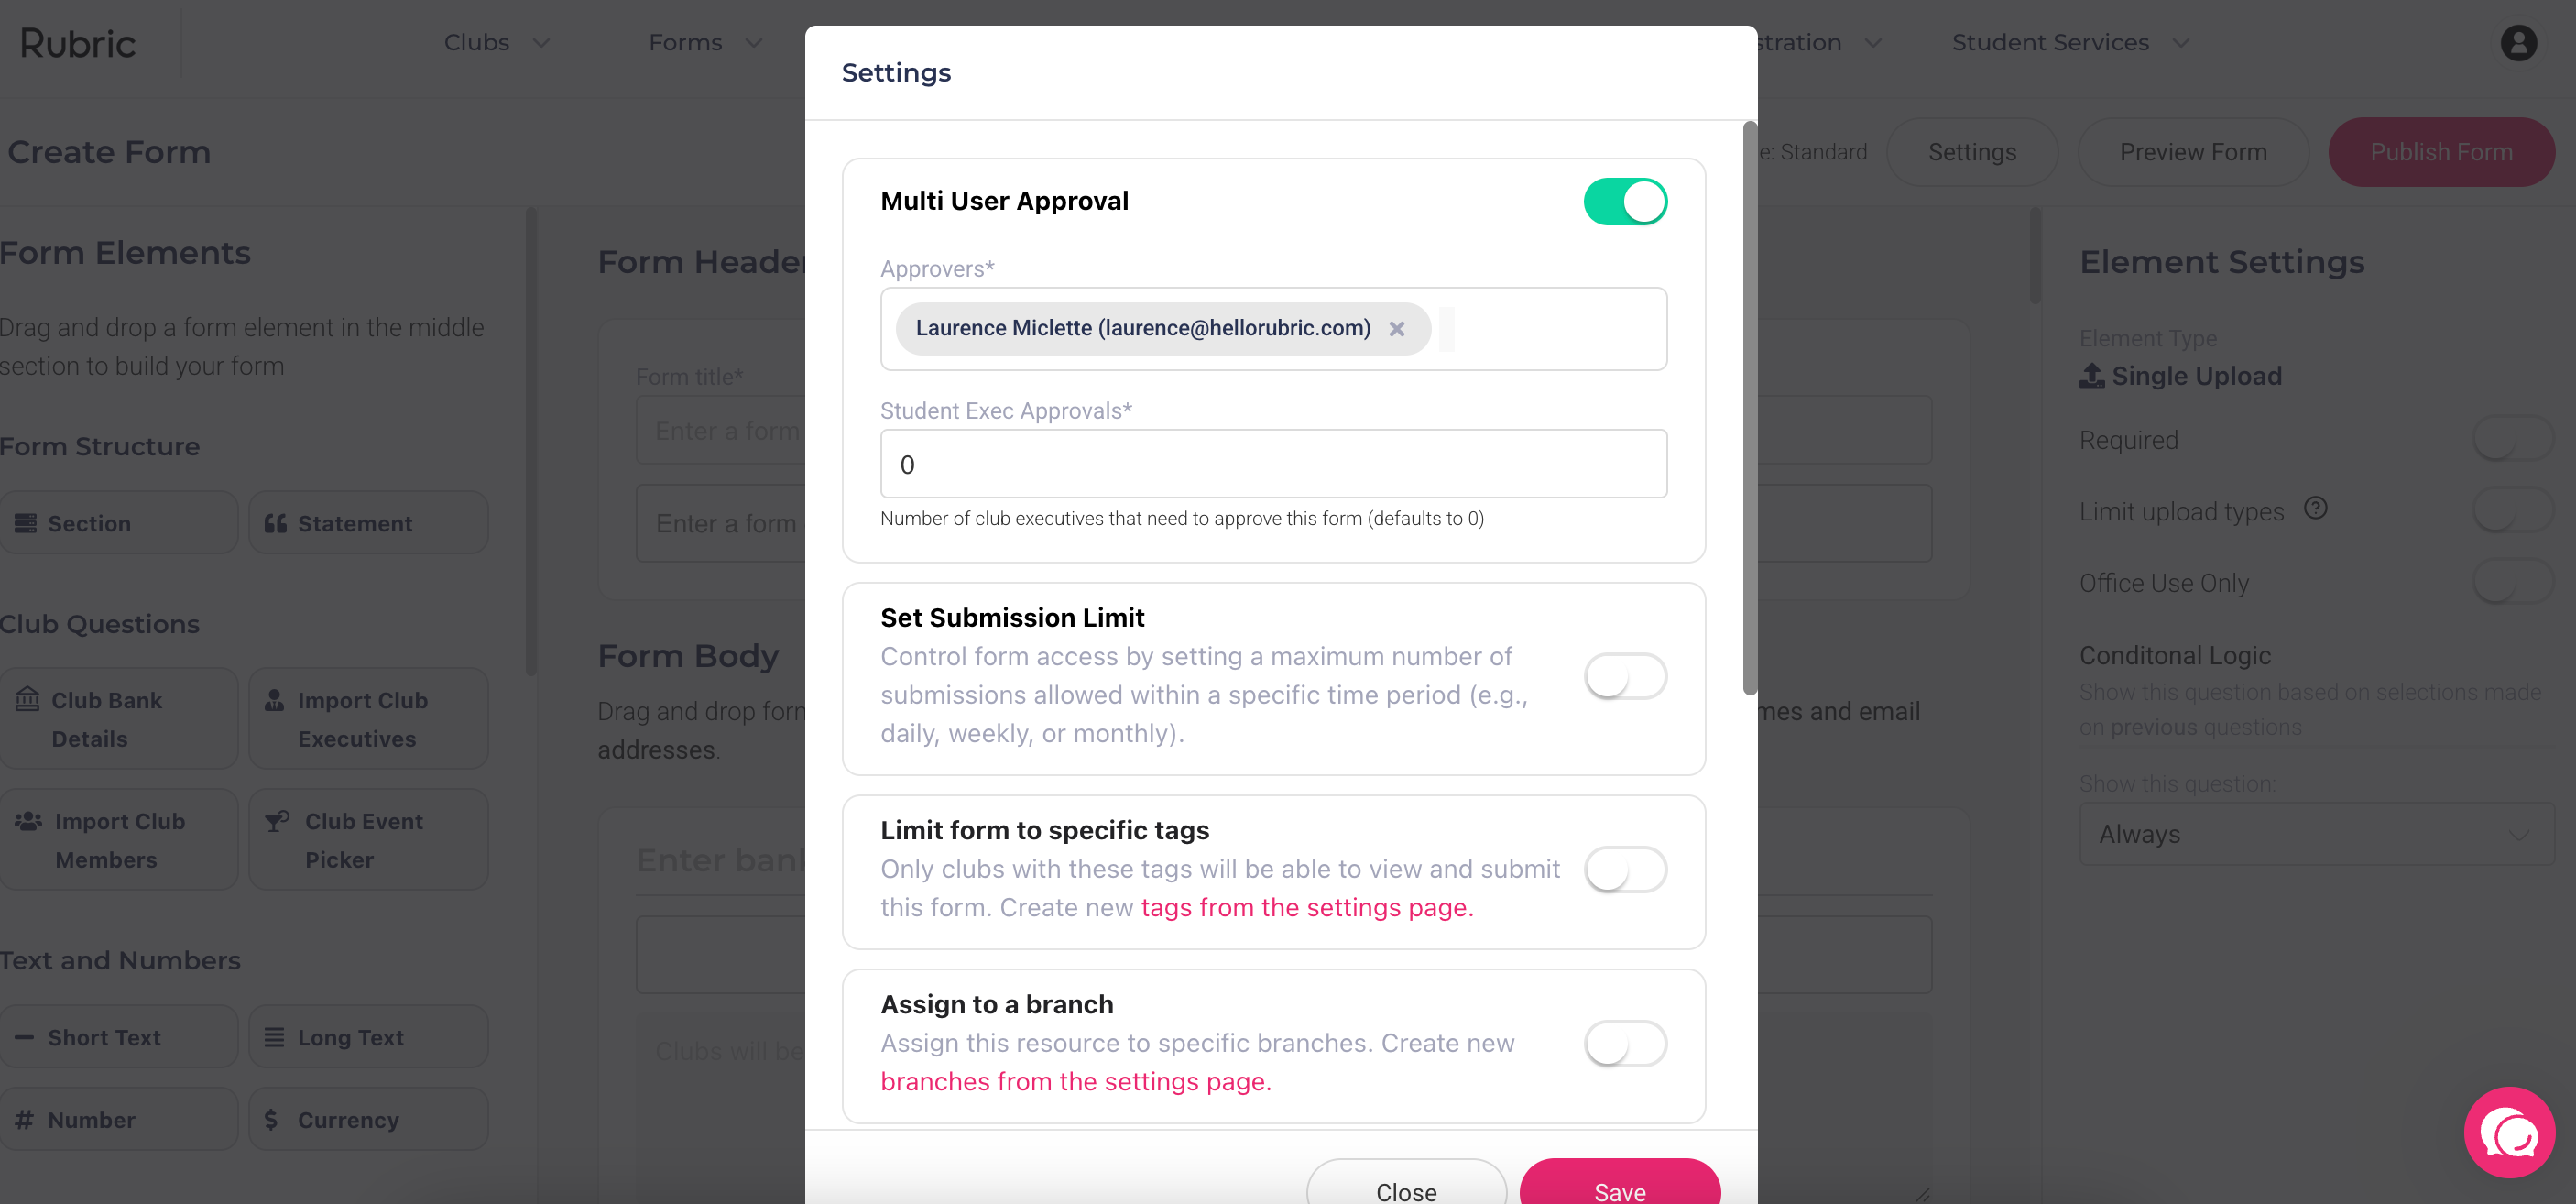
Set Submission Limit: Control how many submissions are accepted (e.g., limit event funding applications to 50 per semester). You can choose total limits or recurring limits (daily, weekly, or monthly).
Limit Form to Specific Tags: Restrict which club types (based on tags) can access the form.
Assign to a Branch: Assign the form to an internal department or branch (like Finance, Events, or Societies). Each branch will see only the forms and submissions relevant to them.
Submission Cut-Off Dates: Define start/end dates when submissions are accepted.
Send Email on New Submission: Notify specific admins via email when a submission is received.
Customise Reply-To Email: Set the "reply-to" address for emails (for notes, approval and rejection emails).
Allow Rescind/Resubmit Submission: Let users edit or withdraw their submission while pending.
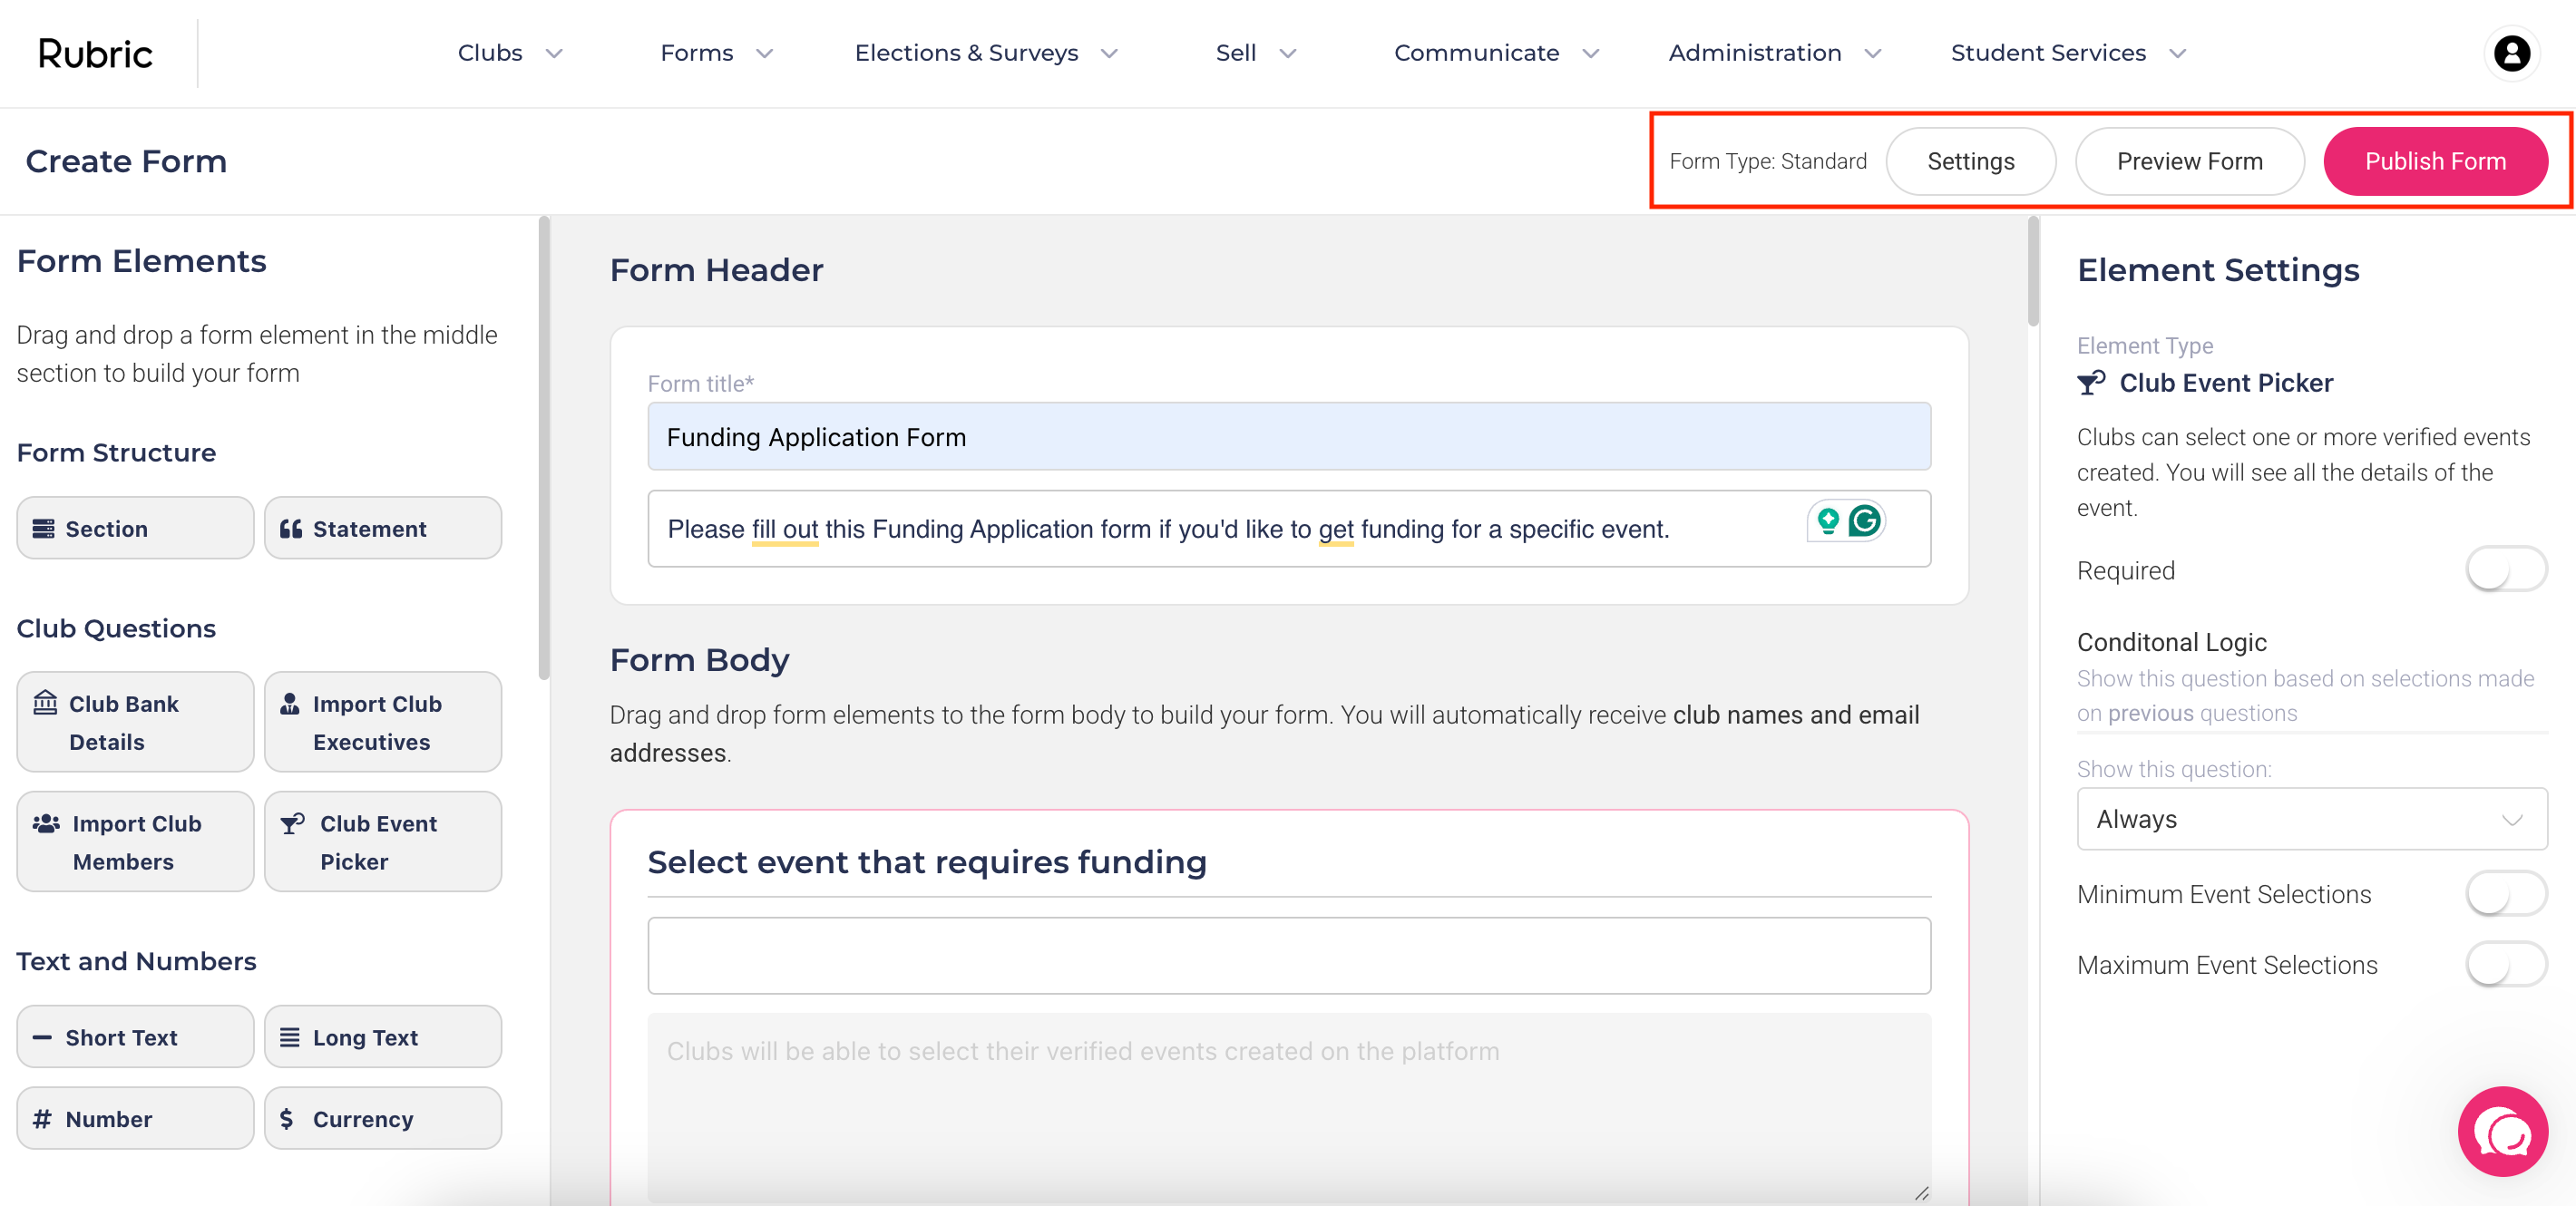
4. Final Actions (Preview & Publish)
Before making your form available, you have two key options:
Preview Form - Click Preview to see exactly how the form will look and function for respondents. Use this step to test conditional logic, required questions, and overall flow.
Publish Form - When you’re ready, click Publish.
Publishing saves your form and sets it to Active by default, meaning it will be visible to the intended audience.
Tip: If you’re still working on your form and want to keep it as a draft, you can still click Publish and then go to Forms > Manage Forms to toggle the form’s status to Inactive. This prevents anyone from seeing or submitting it while you finalise changes.